


This post is a little late in coming. I had a deadline to finish this project of September 12, 2012. I finished and loaded it on the trailer about 1 am September 13, 2012 and promptly headed for the Mackinac Bridge to participate in the 6th annual Mackinac Bridge Tractor Ride put on by Owosso Tractor Parts.
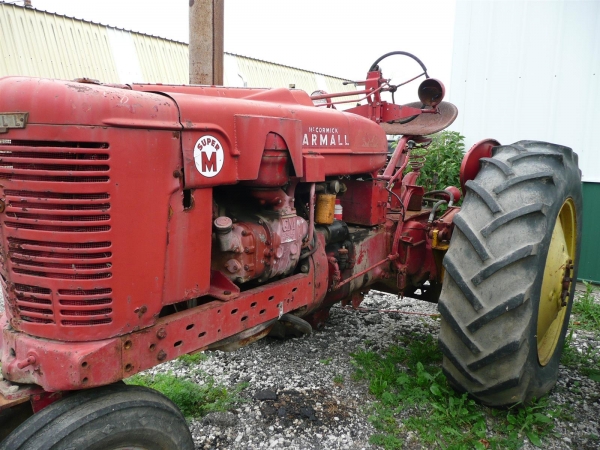
I had zero miles on the M and about 30 minutes of run time on the engine. Needless to say, though confident in my mechanical abilities, there was some nervousness for the first few miles of the ride. By the time I reached Mackinaw City from the staging area West of town the butterflies were gone. In the end the M and the little Detroit performed flawlessly without issues other than I hooked the ammeter up backward.
I have spoken of the background in other related posts about how my Father acquired this tractor, finally, in 2007. My Father passed in early 2010 after driving this tractor in the bridge ride event in 2009, his last tractor show / parade. After my uncle passed in early 2011 it was up to me, more or less, to dispose of the physical contents of the partnership and farm. I held an auction in June 2012, less than a week after losing my Mother to Leukemia. This was the only tractor I kept of the 14 that my Father, Uncle and I had, because of the sentimental value it possesses and because it was my father’s “Holy Grail”.
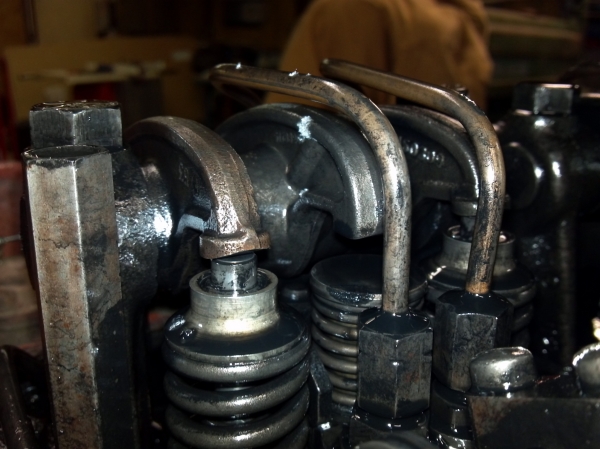 I brought her to my place in January of 2012 and it would not run. It had a stuck an injector while sitting in the barn at my parent’s between my Father’s passing and me bringing it home. I had started it at Christmas time, 2011, when I was home and it ran away on me. There is no air shut-off above the blower and the only alternative I was left with was to kill the fuel and let it run itself out. This took the rings out of it, what was left of them anyway. It has not started well since we had owned it. After that all she would do was make a little smoke out the stack, even with ether.
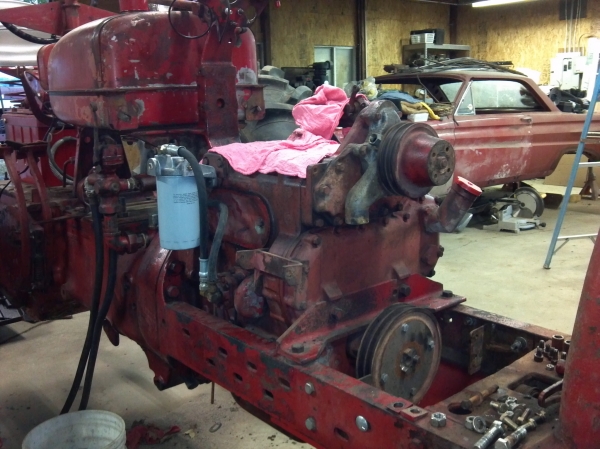 Once I had it home I spent some time straightening a few things out with the engine and I put new N series 18.7:1 1.050 port high deck liners and pistons in it. Just FYI, this won’t work. The 18.7:1 pistons sit proud of the deck in a low block and you cannot get a head gasket to seal. The compression height doesn’t change and the low block, which uses a full head gasket is 1/16th inch lower in deck height. You must use low deck 17.5:1 .81 port pistons and liners. I finally came to the conclusion that I was going to have to purchase and install the correct Federal Mogul kit for the 2-71 and after that I was caught up in my Mother’s illness and prep for the farm auction and sale. If that wasn’t enough I found myself unemployed May 29th, 2012… An actual blessing in disguise.
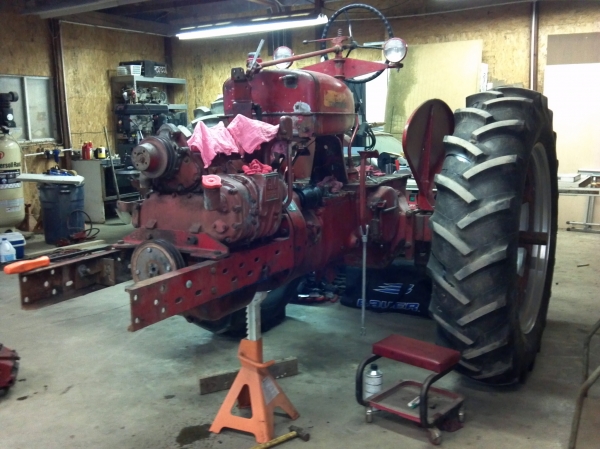 From Mid June onward I was full time working out of my shop on projects and on this tractor with the September deadline looming. Everything I touched needed to be repaired or replaced it seems. I started at the front end and worked my way back. I had to replace every steering seal, bearing and bushing in the bolster as well as the tie rod ends. Then I had to rebuild the Char-Lynn power steering motor. I broke down and bought the correct rebuild kit from Federal Mogul (through Endurance Power) and went through the cylinder head, replaced the one bad injector (70 CM old body N style) and buttoned her up. Then I went to replace the left outer axle seal and things got ugly fast.
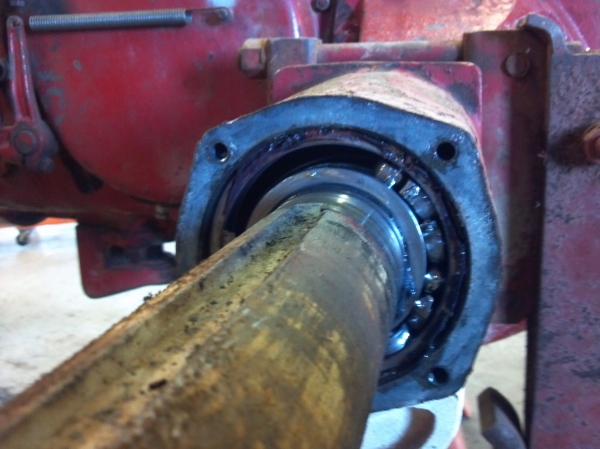 The bearing behind the seal was missing half of the balls. I popped the top to find them and what I found made me ill… Bits and pieces of bearing everywhere, rust galore, rough, pitted, rusty ball bearings, all of the rollers from the pinion bearing lying in the sump, all oil passages and returns packed full of steel shavings. I replaced every bearing, seal and gasket. I completely emptied the rear end housing and started from scratch reassembling and setting it up.
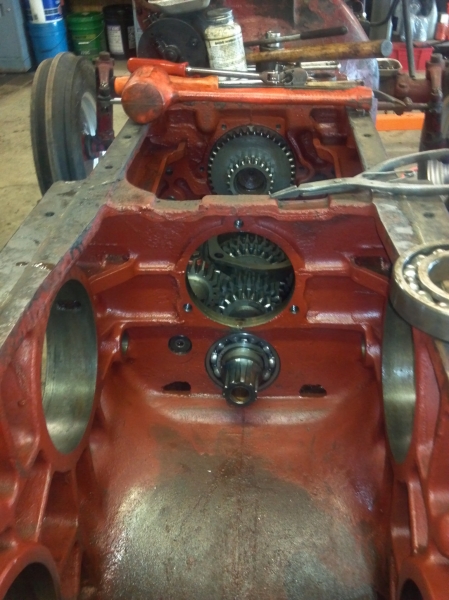
Every component was disassembled, cleaned, inspected and replaced. This is a testament to how durable these tractors were. I am truly amazed that this M was able to make the 20 mile road trip in road gear in 2009 and not have some form of catastrophic rear-end or transmission failure. My father was truly lucky to have completed the ride IMO. Aside from being noisy, as most 65 year old Farmalls are in the rear end there really were no “signs” of impending doom. I had never planned to open up the rear end either. God was at work for sure. After a lot of time, blood, sweat, tears, a few swear words and A LOT of dollar bills I finally had it buttoned up Mid August.
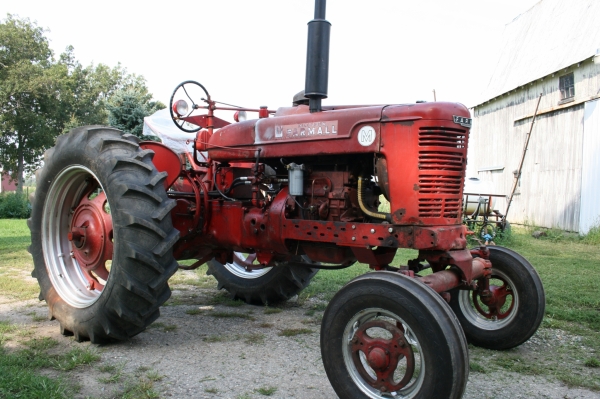
I took me another week to mock up all of the wiring and plumbing for the electrical, fuel and hydraulic systems, including making all hard fuel lines, hoses, cables and wiring. I also had to re-fabricate the air intake system, fabricate a fan shroud, modify a “new” hood and re-solder just about every joint on the radiator (after unplugging it, inside and out). I wanted to put the tractor together as it would be, mechanically, before refinishing it. The last thing I wanted to have happen was to find out something didn’t fit after painting. Now I was beginning to feel the pressure and wondered if I should just forego paint and head North.
I ended up painting it, obviously. PPG’s Shop Line product family. I don’t recommend it for topcoat in Acrylic Urethane. The coverage is poor, especially on corners and rough surfaces. I put 2 gallons of paint and one gallon of epoxy primer, gain Shop Line, on the old girl who was, by this time, almost a “new” tractor mechanically.
Since this tractor had only been repainted one time in it’s life I used stripper and the power washer to take it to bare metal, most of the way anyhow. I have found, through past experience that sandblasting a chassis put sand in everything and after the time I had spent replacing seals and gaskets I didn’t feel like pushing sand into them.
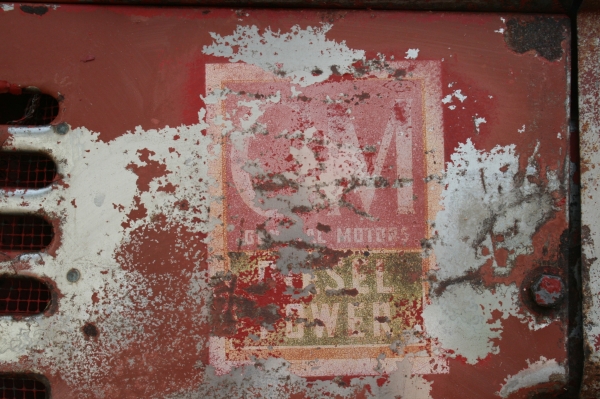 In the process of stripping I found some old decals applied over the original paint. I documented them digitally as well as dimensionally so I can have them recreated in the future. On each side of the grill there were GM Diesel Power decals and on the left side of the tank there was a decal that read, in 3 lines,
Sold and Services By
The Earle Equipment Co.
Detroit – Grand Rapids
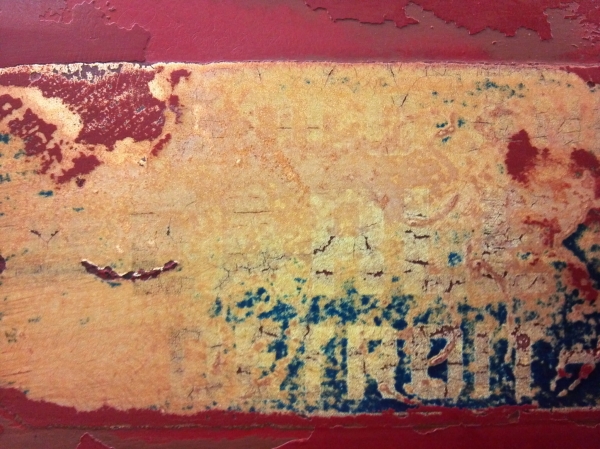 Doing some research I have discovered that the Earle Equipment Co. was a Detroit based construction and agricultural equipment supplier and repairer that was a GM Diesel distributor as well as an Allis Chalmers dealer. They advertised retrofitting your equipment with GM Diesel Power. I have a few pieces of literature from them with these advertisements. The company went under in the early 1980’s but had existed since the 20’s. My assumption, as there is no clear provenance, is that the Earle Equipment Co did the original installation of this GM Diesel package in this tractor. My goal is to try and trace this tractor’s history of ownership as I can in the near future. I am not very confident that I will be able to prove that the Earle Equipment Co. actually installed this engine because of the companies bankruptcy nearly 30 years ago and the fact that this install would have occurred just shy of 65 years ago. Records are likely long gone.
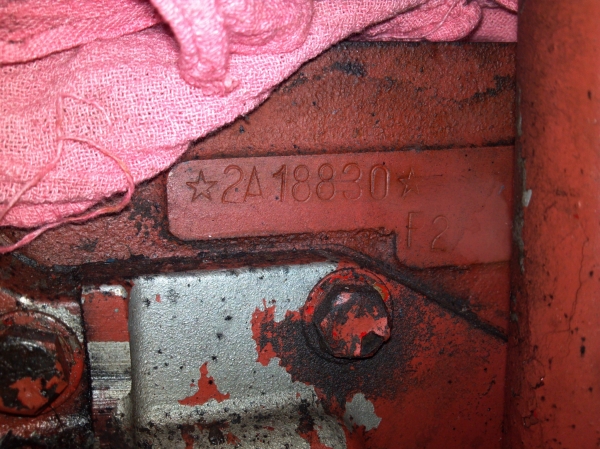 While stripping I also found the tag for the engine which riveted to the block behind the left frame rail. The block S/N is also stamped just below the deck behind the governor. This tractor is a 1949 with a SN of 210XXX. The engine SN is 18830 which puts it at a 1949 or 1950. This also leads me to believe that this engine was installed not long after this tractor was purchased by the owner.
After stripping what I could I went over the chassis with the wire wheel on an angle grinder to remove the remaining paint, rust, scale, grease and dirt. All small parts and parts that could be removed from the chassis were blasted in the cabinet with black beauty. Some parts were re-assembled prior to priming but most were primed and painted off the chassis and then assembled. A good wash with mineral spirits and grease – wax remover and I laid down the primer. The PPG Shop Line Epoxy Prime actually lays down and covers well. I have no complaints with it. It is significantly less expensive than PPG DPLF but due to the mixing ratio 2:1 vs 1:1 it doesn’t go as far.
As I mentioned before the Shop Line Acrylic Urethane doesn’t cover well on rough or textured surfaces such as castings. On flat sheet metal it is fine and covers well in 2 coats. If you are going to use it I would recommend a prime that is close in color. The Primer I used was gray, resulting generally in a “lighter” shade of topcoat finish. I would consider a red primer if I was to use the Shop Line Urethane again. My PPG distributor has since told me a much better option would be their industrial (fleet) finish line. Durable, better coverage, good application, available in urethane and about the same price as the Shop Line Urethane. I will likely go this route on my next restoration, likely the Super A. The whole priming and painting took me about a week and a half.
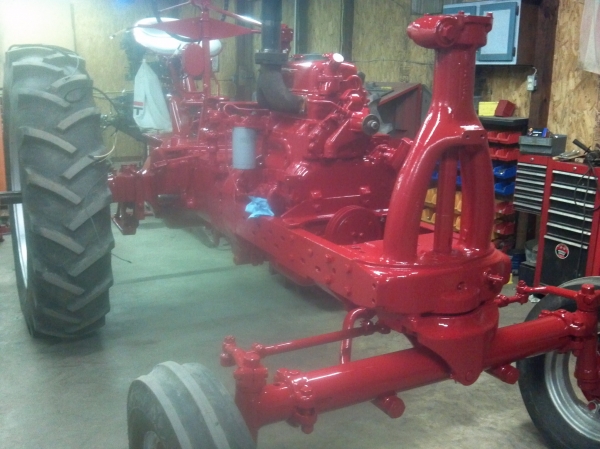
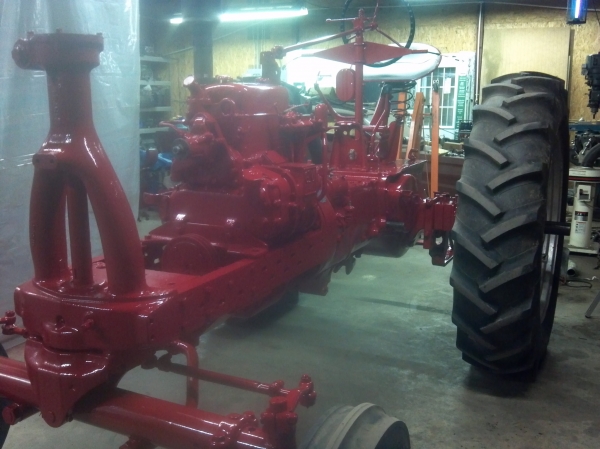 Assembly was pretty straight forward. Since I had mocked the whole tractor up prior to finish it was a matter, more or less, of just re-assembly. The wiring took some time as I was using an OEM Tractor Parts Super M wiring harness that I had on hand. I had also modified the starting system to be more robust since the GM was drawing a lot of amperage through the stock Delco starter. This was resulting in burnt up starter switches, the one located behind the base of the steering post. I changed things up by using that foot switch to actuate a 4 post solenoid mounted to the starter. I was able to use the coil and ignition switch wires to tie this all in. The rear tail light wire was too long and the length I cut off allowed me to wire the foot switch to the electrical box. 2/0 battery cables with soldered ends and a 950CCA battery in the stock under tank battery box get her spinning and started. The engine still requires a little snort of either when it is cold unless you want to go through the crank and wait cycle for 5 minutes.
In the end, I made it Mackinac without much fanfare, stress or excitement. The day of the ride, the further I drove her the better she ran. No noises, smoke, leaks, rattles, etc. She made the 20 mile ride from Mackinaw City to St. Ignace without a hiccup. She really drew the attention over the weekend. This is a unique tractor that you rarely see, especially a period installation rather than a modern fabrication. I am proud to have it in my stable and to be able to be a steward for it. I can hope my Father would be proud of how she turned out and it is somber to know he never was able to enjoy it. This has been a bittersweet journey for me. I have tried to incorporate elements from my Father, Uncle, Grandfather and our family farm, which was sold in July. I maintained most of what my father and uncle had done to configure the M. These modifications include a factory WFE, 560 rims and centers, Char-Lynn power steering, Vickers crankshaft driven hydraulic pump, fan and extension, M&W throttle lever and numerous odds and ends. The hood I utilized, as the existing was cut up beyond repair, is from the M my grandfather bought new in 1945.
I hope to display the M for the rest of the antique tractor community to enjoy in the coming years, including the 2013 Red Power Round-up in Lima Ohio. I am always eager to discuss this tractor or any others like it with anyone interested in doing so. Please feel free to contact me if you have questions, information or just wish to chew the fat.
Regards,
James A. Root II

